Kompilasi Konfigurasi Mikrotik
- Konfig NAT Mikrotik Agar Dapat Melihat IP Publik Visitor
- Membuat Akses VPN dengan L2TP/IPsec
- Konfigurasi Open VPN Server Mikrotik Dengan Mikrotik
Konfig NAT Mikrotik Agar Dapat Melihat IP Publik Visitor
untuk mengatasi masalah agar web server atau web dapat melihat IP publik visitor yang ditempatkan pada jaringan mikrotik denga konfigurasi NAT maka dapat menggunakan fitur Hairpin NAT atau NAT Reflection.
Skenarionya sebagaimana contoh berikut:
server 1: 36.67.22.18 -> 192.168.80.50 port 80
server 2: 36.67.22.19 -> 192.168.80.51 port 80
server 3: 36.67.22.20 -> 192.168.80.52 port 80
permasalahnya adalah saat cek ip lewat internet di server 1, server 2 dan server 3 yang terbaca adalah ip 36.67.22.18. Artinya ip publik pertama saja yang terbaca, sedangkan ip pengunjung server yang terdeteksi hanya ip gateway nya saja:
server 1: 36.67.22.18 -> 192.168.80.50 port 80 -> terdeteksi ip pengunjung 192.168.80.1
server 2: 36.67.22.19 -> 192.168.80.51 port 80 -> terdeteksi ip pengunjung 192.168.80.1
server 3: 36.67.22.20 -> 192.168.80.52 port 80 -> terdeteksi ip pengunjung 192.168.80.1
sedangkan solusi yang diinginkan adalah ketika cek ip lewat internet setiap server terdeteksi ip publiknya masing-masing:
server 1: cek ip lewat internet -> 36.67.22.18
server 2: cek ip lewat internet -> 36.67.22.19
server 3: cek ip lewat internet -> 36.67.22.20
tujuannya adalah agar dapat melihat ip visitor yang mengunjungi website pada server:
server 1: 36.67.22.18 -> 192.168.80.50 port 80 -> terdeteksi ip publik pengunjung
server 2: 36.67.22.19 -> 192.168.80.51 port 80 -> terdeteksi ip publik pengunjung
server 3: 36.67.22.20 -> 192.168.80.52 port 80 -> terdeteksi ip publik pengunjung
nah untuk itu konfigurasinya adalah sebagai berikut:
buat rule
/ip firewall nat
add chain=srcnat src-address=192.168.80.0/24 dst-address=192.168.80.0/24 out-interface=ether8-SERVER action=masquerade
add chain=dstnat dst-address=36.67.22.18 protocol=tcp dst-port=80 action=dst-nat to-addresses=192.168.80.50 to-ports=80
add chain=dstnat dst-address=36.67.22.19 protocol=tcp dst-port=80 action=dst-nat to-addresses=192.168.80.51 to-ports=80
add chain=dstnat dst-address=36.67.22.20 protocol=tcp dst-port=80 action=dst-nat to-addresses=192.168.80.52 to-ports=80
add chain=srcnat src-address=192.168.80.50 protocol=tcp out-interface=ether8-SERVER action=masquerade
add chain=srcnat src-address=192.168.80.51 protocol=tcp out-interface=ether8-SERVER action=masquerade
add chain=srcnat src-address=192.168.80.52 protocol=tcp out-interface=ether8-SERVER action=masquerade
add chain=srcnat out-interface=ether3-WAN-ASTINET action=masquerade
Membuat Akses VPN dengan L2TP/IPsec
Kami akan memberikan panduan untuk membuat akses VPN Server untuk jaringan internet rumah/kantor (indihome). Akses user menggunakan VPN Windows 11.
A. Konfigurasi Mikrotik
1. Buat IP pool untuk klien VPN
/ip pool add name=pool-vpn ranges=192.168.89.10-192.168.89.250
2. Buat profile PPP untuk L2TP
/ppp profile add name=profile-vpn local-address=192.168.89.1 dns-server=8.8.8.8 remote-address=pool-vpn use-encryption=yes
3. Tambah user (secret) -> Bisa ditambah sesuai kebutuhan
/ppp secret add name=opd1 password=Dishub2025! service=l2tp profile=profile-vpn
4. Aktifkan L2TP server
/interface l2tp-server server set enabled=yes authentication=mschap2 default-profile=profile-vpn use-ipsec=required ipsec-secret=Kominfo-Hebat2025! max-mtu=1460 max-mru=1460
5. Konfigurasi IPsec (policy/proposal)
/ip ipsec proposal set [find default=yes] auth-algorithms=sha1 enc-algorithms=aes-128-cbc,aes-256-cbc pfs-group=none
6. Firewall: izinkan paket IPsec & L2TP (UDP 500, UDP 1701, UDP 4500, ESP)
/ip firewall filter add chain=input protocol=udp dst-port=500,1701,4500 action=accept comment="Allow IPsec/L2TP UDP"
# Allow ESP (protocol 50)
/ip firewall filter add chain=input protocol=ipsec-esp action=accept comment="Allow ESP"
# Allow established/related (biasanya sudah ada)
7. NAT: masquerade agar client bisa akses internet melalui router
/ip firewall nat add chain=srcnat src-address=192.168.89.0/24 out-interface=<WAN-INTERFACE-NAME> action=masquerade comment="NAT VPN clients"
B. Akses Pengguna VPN
1. Buka Setting - Network & Internet

2. Buka VPN

3. Add VPN -> isi sesuai password ipsec, username dan passwordnya.

4. Save
5. Connect

6. Jika berhasil maka status Connected

7. coba akses browser dan ketikan my ip address. jika berhasil maka ip publik terdeteksi sama dengan ip publik pada VPN Server.


Video Tutorial
Konfigurasi Open VPN Server Mikrotik Dengan Mikrotik
Tujuan : agar client terhubung secara lokal pada jaringan 192.168.80.0/24
1. Informasi Sistem
-
Router: MikroTik RouterOS
-
VPN Protocol: OpenVPN
-
LAN Server: 192.168.80.0/24
-
Gateway LAN: 192.168.80.1
-
Subnet VPN: 10.10.10.0/24
-
Port OVPN: 1194 (TCP)
2. Pembuatan Sertifikat di MikroTik
2.1 Buat CA (Certificate Authority)
Buka terminal mikrotik:/certificate
add name=ca-template common-name=MyCA key-usage=key-cert-sign,crl-sign
sign ca-template name=MyCA
Cek status Pastikan CA statusnya: trusted=yes/certificate print
Jika belum:/certificate set MyCA trusted=yes
2.2 Buat Sertifikat Server
/certificate
add name=server-template common-name=ovpn-server
sign server-template ca=MyCA name=ovpn-server
/certificate set ovpn-server trusted=yes
2.3 Buat Sertifikat Client
/certificate
add name=client1-template common-name=client1
sign client1-template ca=MyCA name=client1
2.4 Export Sertifikat ke Client
/certificate export-certificate client1 export-passphrase=1234
/certificate export-certificate MyCA
File yang akan muncul di Files:
-
client1.crt
-
client1.key
-
MyCA.crt
Download file tersebut ke PC client.
3. Konfigurasi OVPN Server
3.1 Buat IP Pool
/ip pool
add name=ovpn-pool ranges=10.10.10.10-10.10.10.50
3.2 Buat PPP Profile
/ppp profile
add name=ovpn-profile \
local-address=10.10.10.1 \
remote-address=ovpn-pool \
dns-server=8.8.8.8
3.3 Buat User VPN
/ppp secret
add name=user1 \
password=123456 \
service=ovpn \
profile=ovpn-profile
3.4 Aktifkan OVPN Server
/interface ovpn-server server
set enabled=yes \
port=1194 \
mode=ip \
netmask=24 \
authentication=sha1 \
cipher=aes256 \
certificate=ovpn-server \
require-client-certificate=yes
4. Firewall
4.1 Allow Port OVPN
/ip firewall filter
add chain=input protocol=tcp port=1194 action=accept comment="Allow OVPN"
4.2 NAT Internet
/ip firewall nat
add chain=srcnat out-interface=ether3-WAN action=masquerade
5. Konfigurasi Client Windows
5.1 Install OpenVPN Client
Download pada https://openvpn.net/community/ atau untuk mencari repository lama pada https://build.openvpn.net/downloads/releases/?C=M&O=D
lalu Install OpenVPN GUI.
5.2 Copy File Sertifikat
File:
-
MyCA.crt
-
client1.crt
-
client1.key
untuk dibuat client1.ovpn :
client
dev tun
proto tcp-client
remote 36.67.22.18 1194
route 192.168.80.0 255.255.255.0
resolv-retry infinite
nobind
persist-key
persist-tun
auth SHA1
cipher AES-256-CBC
data-ciphers AES-256-GCM:AES-128-GCM:AES-256-CBC
data-ciphers-fallback AES-256-CBC
remote-cert-tls server
auth-user-pass
auth-nocache
<ca>
sertifikat dalam MyCA.crt
</ca>
<cert>
sertifikat dalam client1.crt
</cert>
<key>
sertifikat dalam client1.key
</key>
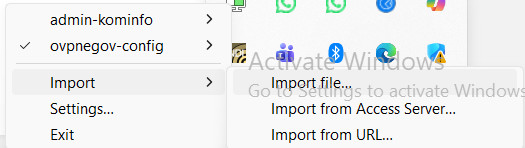
5.3 Import File Sertifikat client1.ovpn pada OpenVPN GUI
6. Connect VPN
-
Jalankan OpenVPN GUI
-
Klik kanan → Connect
-
Masukkan username & password secret PPP
7. Verifikasi
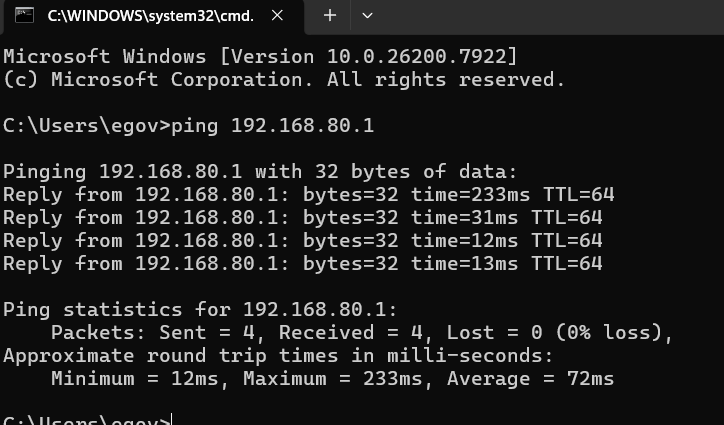
Uji koneksi ke 192.168.80.1